Motorcycle
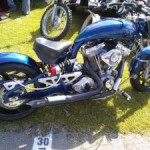
Modifications and improvements made to my ’92 Honda Shadow VLX I named Ruby after my late Grandmother.
Useful Moto Links
Foruml links:
ShadowRiders.com – VLX Forum – My Posts
Carb Jetting
- dual carb VLX jetting
- DJ1145 kit for dual carb VLX
- carb circuit diagram – Graph that shows when each circuit is being used (idle/pilot jet/needle/float height/main jet)
- how to make a test tank from a fuel bottle (no more remiving gas tank for rejetting)
- Jets, needles and lots of other stuff
- sputtering at very top end – jetting solution
- more jetting notes
- Jetting notes (hondashadow.net – sticky)
Tachs and Gauges
Air Filters:
- Dual Carb Pod Mod
- eBay item #400208986706 46mm PANCAKE FREE FLOW POWER AIR FILTER K+N STYLE from Scooter Assasins
- Stax Mod- get rid of the ugly airbox with these velocity stacks (with filters inside)
- West Eagle – where to order the velocity stacks from
- Intake Runner calculator for pulse capture
- Intake runner lenght discussion (cars)
- Cranckcase Breather
Gas Tanks
Parts:
Randoms
Barber Vintage Festival 2013
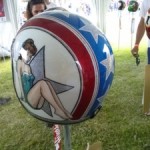
Well I made it to Barber Vintage motorcycle Festival for a single day this year. This was my first time going, but others were saying it was getting bigger every year. Lots of cool bikes/old bikes/parts/junk for sale. There were some cool helmets there too, and the riders in the steel ball (three riders and a showgirl standing in the center) and the wall of death was pretty cool. The wall of death had a 63 year old guy (oldest current rider of the wall of death) that would ride up to the top and snatch the dollars out of your hand. Really cool.
Most of the pics are from the swap meet, but they did also have some exquisite rare motos for auction and of course the big names were there too offering their latest and greatest. Motus was there too, they are local to BHM with a really cool bike that had a V4 configuration. The only pic I didn’t get was a picture of me, ohh well maybe next year. Special thanks to my friends that gave me a place to crash and tour around the festival.
-

- Old Ducati
-

- CB 750 Cafe bike about $k
-
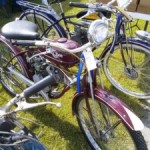
- Whizzer bike about $5k
-
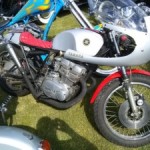
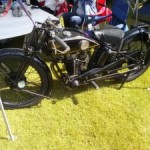
- old yamaha cafe bike
-
- old cafe bike
-
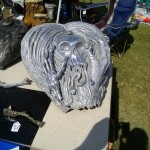
- crazy tank cover
-
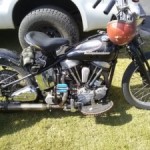
- old Harley with chain edge floorboards
-

- old bike with sidecar
-
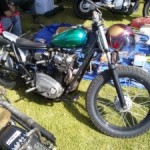
- old bike
-

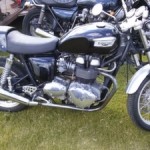
- new cafe edition Triumph? C7 I think
-

- wall of Death bikes, One was a ’23 Indian
-

- army sidecar
-

- army sidecar
-

- salt flat racer in the Triumph tent
-
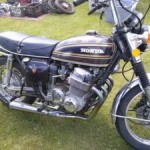
- CB750 just like my dads old bike
-

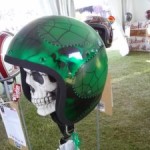
- cool Helmet, This was my fav because of the color, flake and pinstriping
-
- another cool helmet up for auction
-
- My second favorite helmet
-

- Also liked this one.
-

- really old indian at the swap meet, not for sale, he just rode it
-

- interesting little pit bike with bi-moto style steering
-

- don’t even know what this is
-
- This was for sale for around $3900
-
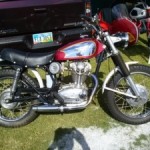
- Old Royal Enfield. I liked the tool kit on the rear fenders.
-

- immaculate royal enfilds
-

- old yellow ducati
-
- Confederate 13k$, from Birmingham
VLX Dual Carb Jetting with pod filters
The Skinny on needles:
Ok, dropped my needles one clip to the 3rd position from the top. This seemed to help the off idle stumble a great deal. Throttle response in the 1/8 to 1/4 idle range seemed to be much better. Seemed to run better in downshifting from 3rd gear. I will ride it for a while and report back.
I could not drop the needle any more, I tried the next clip down, but couldn’t get the plastic needle holder it to seat in the slide. It looks like it could be done if you got a shorter spring and nipped/trimmed the plastic nub some, but didn’t want to try that, just noting it here.
So… while I had the needles out, I took some measurements and pics.
click the pics for larger versions. They are not the best quality, but you can get an idea of what these DJ1145 kit needles look like.
Here’s a link to the muniki needles that I was thinking might work, but not sure about the interchangeability of these needles in the kehign carbs and I’m not sure whiech kehin needles would be used that are most similar to the DJs.
Jets r us needles.
 Needle comparison. stock (Top), DJ1145 (bottom)
The DJ1145 kit comes with two needles. you can see the clip positioning grooves on the end and the thinner profile needle will let more fuel in. Needles can also be purchsed from JetsRus individually.
Needle comparison. stock (Top), DJ1145 (bottom)
The DJ1145 kit comes with two needles. you can see the clip positioning grooves on the end and the thinner profile needle will let more fuel in. Needles can also be purchsed from JetsRus individually.
 needle clips sm
 needle diameter mid
 needle diameter
 needle grooves
 needle length endtaper
 needle length
 needle length toptaper
 needle diameter thin
Well I just found out that I drilled/jetted my carbs to 159 main jets! That’s HUGE as far as sizing goes. Turns out aht Kehin jets are metric sizing (135s are 1.35 mm, 140s are 1.40 mm and so on). So the 1/16″ drill bit is basically 1.5875 mm or the equivilent of 159s. Ordered some more jets from Jets R us just now and will rejet again soon.
Also, don’t know if Jet’s R us sells the correct kehign needles for these carbs. the needles I was looking at (which seemed very similar to the DJ needles), were for Muniki carbs. I will take some good needle measurements with some calipers when I rejet (again…)
Bike is jetted! Runs GREAT in all throttle settings except WOT at the very top of the revs(~95mph). It chokes out just a bit at that speed/RPM, but I wont be doing that anymore anyway. Bike pulls MUCH more all the way through the revs and is MUCH faster 3rd gear goes up to 80 now, 2nd gear – 60. I can now remove air filters, carbs and rejet and have all reinstalled in under 30 minutes. This is primarly thanks to the test gas tank (that doesnt have to be removed) and having no airbox/hoses ect…
Current setup:
- DJ 108 mains drilled out with a 1/16 inch drill bit. I figured I’d never need these again anyway. I was going to try some 140s, but nowhere in town carried them. Previously was 135s OEM replacements from Jets R Us.
- pilot jets 42 OEM
- needles set 2 clips from the top
- idle air screws 2.5 turns out
- using pod filters (seen below) WITH stock carb boots – Filters attached to end of the boots as opposed to straight on the carbs. The right carb did require a metal spacer that I got from the local auto parts store and hacked the ends off. May try longer spacers in the future to see if that changes anything.
- many thanks to 3rd Degree and obnoxious on the shadowriders site. (http://www.shadowriders.net/forums/showthread.php?t=20644&page=9)
To Dos:
- try longer intake runners to get pulse effect
- run breather hoses and filters
- sync carbs
- do a plug pull
Previous WOT run:
6/23/2011 (idle air screw = 3.5 | pilots = 40[stock] | needles=2nd from top | mains=135):
Ran bike with air filters taped up 1/4 of the way. Bike ran great on the needle. lost power on top end. Would not get ukp over 95. Noticeable amount of popping on decel in high gear. Seemed to use a lot of gas.
OK, so I’m sick of the big ugly airbox. I’m trying pod filters on the bike now. Basically little pancake filters are added directly to the carb throats. This requires rejetting because there is more air flow. There is also another mod similar to this that others have had success with, called the Stax mod. Basically instead of pod filters, you put a couple of velocity stacks (that have filter material inside), and OEM125 main jets. Click here, download the PDF and check the thread for some very interesting reading. If you wanna go this route, you can email Hiro at West Eagle to order the Kajima Funnels for your bike. He has the model information. Hiro is a really cool guy and very helpful. His email is Hiro@west-eagle.com
Other Related threads/pages of interest:
shadowriders (many thx to 3rd Degree)
tank bottle (good idea for a temp/test tank)
West Eagle – get velocity stacks (if you wanna go that way instead of pod filters)
Three basic components needed for this mod to work correctly: Jet kit DJ1145, Scooter Assasins Pancake Filters PN#400208986706 , Main Jets (OEM135)
You can get the DJ kit from lots of places, other similar filters and jets may work as well. JetsRUs has a simple easy to use site and in addition to carrying OEM main jets they also sell allen bolts for the carbs, and a surprising array of needles. The theroy behind the allen bolts is that you can use them along with a ball head allen wrench to remove the slide cover (and maybe even the float bowls) without removing the carbs. Ill belive this when I do it first hand. You might even be able to get by ordering just a few needles as opposed to buying the DJ kit(which you really only need the needles from).
Needle comparison. stock (Top), DJ1145 (bottom)
The DJ1145 kit comes with two needles. you can see the clip positioning grooves on the end and the thinner profile needle will let more fuel in. Needles can also be purchsed from JetsRus individually.
 Pulling the slide and diaphragm
 Drill out the bottom hole of the slide (there was already a detent here). drill bit included in the kit.
 DJ112 Main Jet (left) and Kehien/stock 115(right).
The DJ kit comes with two 112s and 108s. the stock jet#s and DJ jet #s do not match. Most dual carb VLX modders are going with OEM 125 - 135s.
DJ112 Main Jet (left) and Kehien/stock 115(right).
The DJ kit comes with two 112s and 108s. the stock jet#s and DJ jet #s do not match. Most dual carb VLX modders are going with OEM 125 - 135s.
 Pod/pancake Filters
 side view. it looks off but the tape measure starts at the 1" mark, and the total filter is just over 2" tall.
 I.D.
I.D.
 Top just 2 3/4"
 Breather hose removed
VLX Dual Carb Rebuild
Dual Carb Rebuild
When I got the bike I didn’t know if it was jetted or not. It came with drag pipes, so I thought It might have been jetted, but of course theres only one way to find out! Below are the steps that I went through cleaning my first ever carb following the Haynes manutal. It did have a bit of rust dust, but overall, it was in pretty good condition. If you see a needed edit, please let me know and I’ll be glad to change it.
 Left Side
 Right Side
 Top view
 Airbox Removed
 Right Side Hoses
 Coolant Hose Disconeected
 Left Airbox Boot
 Right Airbox boot
 Breather hose (right side)
 Breather hose removed
 Throttle cover plate
 Throttle plate. Tip: remove the circled bold on the left first, then the circled bolt on the right, then the cables. It is MUCH easier to remove the throttle cables AFTER the throttle plate is disconnected from the carbs.
 After some finagleing, creative angling and maneuvering, the carbs come out. pulling up the wire tab helps.
 Left Side
 Right Side
 Front View
 Rear View
 Choke cable
 Choke cable
 Diaphragm cover
Fork Rebuild
Fork Rebuild
Note: Special Tool May be required for breaking open the dampening rods.
- Fork Rebuild Special Tool discussion
- How to make Fork Rebuild Special Tool
- Yet another Fork Rebuild Special Tool thread
I didn’t notice the blown seals and shotty fork operation on the test ride, so rebuilding the fork on this ride was one of the first things in order. Due to the requried special tool, I put it off longer than needed, here’s the pics/walkthrough.
I used the Haynes manual as a guide. When installing the bushings and oil seals, I used PVC pipe as a bushing press. I cut one shorter piece to use as a set, and a longer piece to use as a slide hammer.
First, get the front end of the bike up. I was able to do this with a couple jackstands. Take the front wheel and fork tubes out. Now you can remove the top cap and spring/spacer and drain the oil. My oil was very dark grey, and looked nothing like the fresh red liquid that was used as replacement. Notice I put the fork in a vice with some rubber cushoning (camper shell sealer) on the vice jaws. Also keep in mind the top cap is under a bit of spring tension, so be prepped to catch the cap and start draining the oil.


 Once the oil was drained I tried to get the tubes apart, but it requries a special tool to hold the dampening rod. You can see the 12 sided recess that the special tool fits in to keep the tube from spinning.
 Here is a picture looking down the fork tube with the oil drained.
 This is a close up of the same picture above, you can see the 12 sided recess in the top of the dampening rod.
 I could not get them apart so I took them to a local shop to get them broken apart. The guys at the shop used and impact wrench and I belive they did not have to use the special tool to get them apart.
In any case, here's what I got back from the shop
I could not get them apart so I took them to a local shop to get them broken apart. The guys at the shop used and impact wrench and I belive they did not have to use the special tool to get them apart.
In any case, here's what I got back from the shop
 Here is a shot of the old fork seals(in bottom of pic). You can see how bad they are. In order on the tube from left to right, is the tube bushing, back up ring, oil seal, and dust seal. *Note that there is a stopper ring that normally goes between the oil and dust seals, but in my case due to the rusting, mine were disentigrated and rusted into peices.*


 While I had this out, I made version of the special tool out of an oak dowel to help with reassembly.
 Also in the top of the picture are the two plastic oil stoppers that go on the bottom of the dampening rods. On reassembly, make sure you pit them on the same way they came off (tapered side facing up).
Here is a better picture of the dampening rod and recess that requires the special tool
Also in the top of the picture are the two plastic oil stoppers that go on the bottom of the dampening rods. On reassembly, make sure you pit them on the same way they came off (tapered side facing up).
Here is a better picture of the dampening rod and recess that requires the special tool
 Here you can see debris in the fork leg. There is a recess that the snap ring slides into that must be free of debris. I used some degreaser/toothbrush/paperclip to get it back to spec.
 Here is the snapring, new in package. It goes between the oil and dust seal.
 Once the lowers were cleaned up I reassembled the tube (reattach the dampening rod to the fork leg and tube, then put in the springs, spacer and oil). Since I did not have an impact wrench and my specail tool might not hold up to hight torque specs, I used some non permanent locktight to seal the bolt on the bottom of the fork leg (as the manual suggests).
Now the tubes in the legs will help guide the bushing and bushing driver, and oil seals and lock rings
Here is the leg with the bushing, oil seal and lockring in (only missing dust seal). Look closely and you can see the lockring on the right side
Once the lowers were cleaned up I reassembled the tube (reattach the dampening rod to the fork leg and tube, then put in the springs, spacer and oil). Since I did not have an impact wrench and my specail tool might not hold up to hight torque specs, I used some non permanent locktight to seal the bolt on the bottom of the fork leg (as the manual suggests).
Now the tubes in the legs will help guide the bushing and bushing driver, and oil seals and lock rings
Here is the leg with the bushing, oil seal and lockring in (only missing dust seal). Look closely and you can see the lockring on the right side
After that it is just the dust seal (I pressed mine in my hand) and reinstall the tubes on the bike.
My results were much better than compared to the old fork. I think my seals were not only shot, but the fork was really low on oil, so having oil dampening in the shocks really helped a lot.
LED Blinker Mod
I decided to clean up the rear end of my shadow. The first part was replacign the huge stock blinkers with some mini LED versions. I was hoping to mod so that traffic from the side can tell if I am turning as well as traffic from the rear. I got them off ebay for like 15$, and they look cool, but arent all that bright enough to be safe.So after that I found these cool flexible, weatherproof LED strips on www.oznium.com. I got 2 white 2.4″ strips for the tag lights, and 2 orange 19.5″ strips for the rear blinkers. Below is the installation walkthrough
First I installed the mini LED blinkers on the stock mounting brackets. The blinker that I used had grounded mounting hardware, so I had to run a wire from the hardware to the bullet connector, to keep every thing close to stock as possible. I could also go back to stock using this setup because I did nt modify the mount. To mount the mini blinks, I used a series of fender warshers and rubber washers that I cut out of old bicycle tube to minimize vibration.
LED blinkers and Tag bracket/light
 First remove the three wires that run the rear tail light, then remove the fender to get to the frame and wiring.


 Remove the nut that holds the blinker assembly on, snip the wires and remove the blinker.
 Wire the LED Blinkers up on the old stock mounts. I used a series of fender washers and rubber washers to help with the vibrations. I slso had to run a wire from the hardware to the gound wire, and used bullett connects in case I want to go back to stock.
 Removal of the tag bracket:


 Edit: I made some spacers out of 3 stacked layers of fuel line and sip tied them to the corner of the framerails (not seen in this picture) to flare the rear fender out enouth to not rub the LED strips. This made it a bit tricky to remove/install the fender, but was easier than adding spacers to lift the rear fender up ( as opposed to flaring it out) due to the mounting points seen here above the tag mounts and on the tail light.
After removal of the stock tag parts, I began making a new lowprofile tag bracket out of 3 side square tubing from the local hardware store. I was hoping to use the old reflector mounting bolts, but they are not quite wide enough. The bracket is made out of aluminum, so it is easy to drill/saw, and I mated the three peices with some JB weld. I had to drill holes for the following: mount to frame(using old reflector holes), tag mounting holes, safety clip holes, holes to help fabricate cuts in center peice, and an array of holes for the wiring gromets in the center top peice..
Here are the three peices before being JB welded together. the top one holds the tag lights, the middle peice is just a connector(I sawed off one leg to make this just a right angle piece), and the bottom peice is what mounts to the frame. Also note that the peices are roughed up with sandpaper on appripriate sides before assembly.
Edit: I made some spacers out of 3 stacked layers of fuel line and sip tied them to the corner of the framerails (not seen in this picture) to flare the rear fender out enouth to not rub the LED strips. This made it a bit tricky to remove/install the fender, but was easier than adding spacers to lift the rear fender up ( as opposed to flaring it out) due to the mounting points seen here above the tag mounts and on the tail light.
After removal of the stock tag parts, I began making a new lowprofile tag bracket out of 3 side square tubing from the local hardware store. I was hoping to use the old reflector mounting bolts, but they are not quite wide enough. The bracket is made out of aluminum, so it is easy to drill/saw, and I mated the three peices with some JB weld. I had to drill holes for the following: mount to frame(using old reflector holes), tag mounting holes, safety clip holes, holes to help fabricate cuts in center peice, and an array of holes for the wiring gromets in the center top peice..
Here are the three peices before being JB welded together. the top one holds the tag lights, the middle peice is just a connector(I sawed off one leg to make this just a right angle piece), and the bottom peice is what mounts to the frame. Also note that the peices are roughed up with sandpaper on appripriate sides before assembly.

 Here is a template about how the bracket is put together. Blue attaches to frame, green holds them together, red holds the lights


 Here you can see the mockup with the lights. looking back, I could have just used a single longer light as well. To help with the wiring, I drilled some holes, and then siliconed in some rubber gromets made from old power cable casings.

 I also had some 19.5 inch orange strips that were going to go aroung the fork tubes as front signals, but since the mini LED was small and dim as compared to stock, I decided to go safer and install these strips as rear blinkers. With the fender off, it was very simple. These units are very flexible on X & Y axes as opposed to just being flexible in one direction like some other units. They also included some adhesive tape, so bsically, you just clean the lip of the fender, run the lights, run the wires. I did make sure to leave a good bit of slack on the wires, bundeled and hiddend under the rear, so in case you ever have to take the fender off, you will have some extra wire to stretch the fender out and place somewhere near the bike whie the res of the wiring is disconnected. I put tothe my mini blinks and LED stips on the same bullet tip that spliced into the stock wiring. One last thing that I did was put in some safety clips to keep the tag bracket on in case the bolts/wires let go in hopes that I will notice it dangling before it finally lets go if that scenerio ever arises. The clips are just small zip ties that are left a bit loose intentionally.
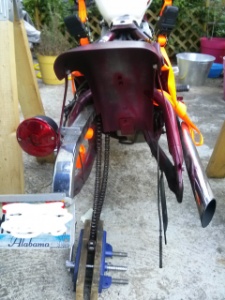
 So here are the completed pics, as you can see it cleans up the rear end quite a bit. I wold have been interested in remving the tail light/brakelight, but it would have left a spot on the fender to be bondoed/painted ect. This is one of the things that I like about the newer model shadows, having the brakelight under the fender just makes it look naturally smoother.
 Don't waste your money on these cheap ebay pieces of crap tiny round LED blinkers. One broke off within a day or two and the other one rattles away in the wind somewhere on the backroads (I guess tat is my fault technically). I just replaced these units with cheap orange pigtails and orange filiment bulbs from local auto parts store and tucked them under the rear fender when I redid the fronts. I tried using the electronic flasher relay with no rear filament bulbs, but never could get the flasher to work without a filament bulb in the wiring, oh well... whatever... blinkers still look and work great, but remember to use heat shrink tubing on the solder joints to keep out the elements.


Need a new Moto Chain? Do it yourself and save around $200! Heres how
OK so my chain was stretched to the limits, and my sprockets looked like they belonged in sharkweek and such, so time for new stuff! Got an RK x ring chain, and stock sprockets 16/44 off amazon for about $200.
Now here’s how to install it on the cheap. Don’t have a chain rivet tool? you can use the harbor freight chain breaker ($14), or buy a chain rivet tool from any number of other brands for $100 or more. take your pick. Guess which one I used? I think last time I ended up using a giant C clamp. I prefer the rivet type master links as opposed to the clip on style, just don’t trust those… anyway… on to the next cheap-o loop hole…
Don’t have a moto stand? You can use some sawhorses(look for the quick assemble metal box type at the hardware store. They are metal, $4/pair and made to accept 2x4s) and ratchet straps to hoist it up just enough to remove the rear wheel (If your are changing rear sprocket).

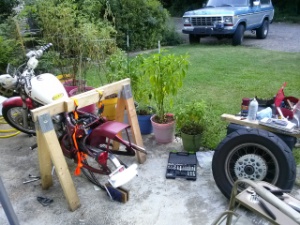
This is the first time I tried this, and it worked well enough, but here are a few pointers:
Either use sawhorses with decently long legs or use a lower point on the bike to hoist it up. Mine were about 3 feet tall and 3.5 feet wide with the ratchet straps wrapped around the top frame rails. My frame VLX rails are exposed because I removed the stock seat. If yours are stock, you’ll need to find another anchor point for each side preferably. Next time I’m going to try attaching to the passenger peg mounts. I barely had enough room to lift the rear up to remove the rear tire, because of the ratchet straps I used and the short sawhorses. Never the less, you only need to lift the rear up enough to remove the rear wheel/axel, so you dont want to hoist it up too far in the air anyway, as it will have a front balance point of the front tire.
You can maneuver the loose chain off the sprocket and remove the rear wheel first (before breaking the chain). This will give you a little more space to break the chain.
So once the rear tire was removed, Pulled off the old sprocket (You may want to break these sprocket bolts loose while its on the ground). Then replaced with the new one.
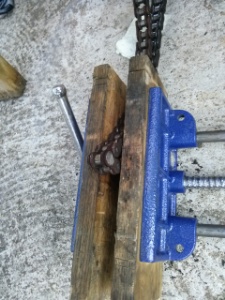
To break the chain, I put it in a vise, to hold it still, and then used a dremel tool cut off wheel to just grind the nub of a pin flat (no bulges on one side so that the pin can be pushed out the other side with the chain break tool). Last time I did this I dremeled through a side plates (a little more work). I suppose if you don’t have a dremel and want to stay ultra cheap, you can hack saw it to death on the side plates.
Removed and replaced the front sprocket (after removing the primary cover). It also helps to shift into gear to remove. Also you should add some locktight to these bolts that hold the front sprocket on.

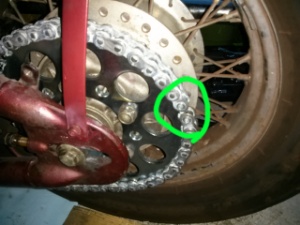
Running the chain: First I put down some boards or something to keep the chain out of the dirt when it hits the ground. The chain will be covered in thick grease that will attract any dirt it touches, so best to try to keep it clean. Also make sure that you have adjusted your rear axel so that there is some slack to install the chain (you’ll adjust this out later). Then put one end of the chain on the top of the rear sprocket (so that end is held by only a few teeth), and run the other end up around the front sprocket and back to the rear (kick it in neutral to roll the chain over the front sprocket). Then put your master link in from the inside of the wheel pointing out. This will give you more space to work with the chain breaker on the outside of the wheel.
Here are a bunch of youtube videos about how to use the harbor freight chain breaker as a rivet tool:
Clean off all the old grease and lube it up and go for a ride, Congratulate yourself on saving some cash from doing this yourself, or just go more bike parts.
Ruby To do list
Here is a short list of upcoming moto mods to do:
- finish side panels
- rear blinkers
- tag bracket and brake lights
- redo forks
- paint