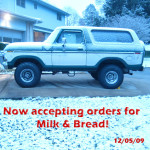
OK, so my wheel bearings needed replacement on the front passenger side. They were loose and making a wobble sound and eating up tires. Also the 4×4 did not work even when the hubs were locked. So on to the repair.
Ok so i went to rockauto, and the do have some parts to do the job, bit they are not timken bearings(which ive akways heard good things about) and they dont have the upgraded lock ring.
JBG, on the other hand has timken bearing sets, has the lockring upgrade, and has everything sorted put and easy to find. I got the lockring(about$50) and one side set of bearings(about 25$) and seals on the way for sunday. Im gonna do one side this week and the other side next payday.
I bought some parts from JBG:
- inner bearing (part of kit#22159K) – Timken set 45 LM50130-LM501349 (Includes Bearing Race)
- outer bearing (part of kit#22159K) – Timken set 37 LM603011-LM603049 (Includes Bearing Race)
- hub seal (part of kit#22159K) – seal only link
- Stage 8 X-Lock D44 kit
- spindle repair kit (not used at this time)
Here is my thread on Full Size bronco:
http://fullsizebronco.com/forum/showthread.php?t=320898
Found some exploded views:
http://www.supermotors.net/registry/media/101434_1
http://moparforums.com/forums/f76/axle-schematics-7801/
Here is a link to a newer model broco brake pad replacement walkthrough with a lot of pics that I used as a guide to get all the hub internals out. A lot of it is the same, but the main chunk of internals in this writeup is not present in the 78 model bronco.
Here are some vids that I also used as a guide. Mostly I used this to determine/confirm how to get the seals out and the bearing races out. These vids are for a 77 era chevy with a D44, but the procedure is very similar. The main difference is that I did not do the spindle bearings at this time.
Youtube D44 bearings replacement part 1
Youtube D44 bearings replacement part 2
Part1
Part2
So I got the wheel off , brake caliper removed (hung to coil spring with a zip tie) and all the hub internals out. Pic below to show order of parts. First part to come off was on right, and the last part to come out was the outer bearing (on the left). After all that is out, the hub and rotor will come off as one piece. At that point, it was time to clean them up a bit and replace the inner bearing (that is pressed into the hub housing). I also noticed that one of the slotted lockrings looked a little warped(dished to the outside). This may have been causing my issue of the hubs not locking when they were set to lock.
So before I went banging away at the parts inside the hub housing, I wanted to 1) make sure that the bearings came with the races and 2) make sure that the races can be removed (not part of the hub housing) – which inside lip do I start banging on with a drift to remove it. First thing to do is watch the part 2 video linked above to get an idea of the procedure. Then check to make sure that your bearings include a race (It appeared to be separate in the video above for the chevy).
Since the outer bearing comes out pretty easy (you will still need to remove the race), I decided to focus on the inner bearing and seal first (more difficult). The seal holds the inner bearing in the hub, so it is stacked like this wheel>hub>inner bearing race>inner bearing>inner seal. So the first thing to do is remove the inner seal and try to get the inner bearings out.
Here is a picture of the seal (Part#???? from JBG).
old seal to be removed.
new seal pic here.
To get the old seal off, I used a big flat headed screwdriver and opened the lip by gently tapping around the whole thing. After about 1/16″ gap between the lip and the hub housing, I pried it off. If you have a slide hammer with the inner claws, that could be used as well. Or a simple seal puller might work as well. I think next time I do this, I will use the single prong seal puller and move around in a circle to minimize marring up the seal top mating surface. Anyway, the inner bearing came right out, but the race was seated pretty good. To get it out, I flipped the hub over and used a drift and tapped around the inner circumference, constantly moving around in a circle. I flipped it back over on occasion to check progress and make sure that the race was coming out evenly and not lopsided. After a few minutes of this, the old race dropped out.
Once both races were out, I compared the old and new to make sure they were the same size and such.
Here is a pic of the inner bearing (The bigger one) Old on bottom and new on top. They appear to be the same so good to go with installing the new one. Smaller bearing is pretty much the same but a little smaller.
Pic***
So to put the new inner bearing race in, I dropped it in and then turned the old bearing race upside down and then used a small section of 2×4 to seat it as flat as possible. This way minimizes the chance of marring up the new race. Once it was started evenly, I kept tapping it in using the old bearing and a hammer, gently tapping in circles until I felt it was set. Then I used a small mirror to check the inside of the hub to make sure it was completely seated and there was no gap left.
Pics*** If you look you can see a couple spots on the bearing race.
After that, I packed the bearing with grease and dropped it in to the hub/race. Then using the block of wood, I gently seated the seal.
The outer bearing race (the smaller bearing), was pressed into the hub housing as well. So I used a drift in much the same way but this bearing race was much easier to come out.
So now I was ready to basically reinstall the hub internals in reverse order of removal.
