OK so my chain was stretched to the limits, and my sprockets looked like they belonged in sharkweek and such, so time for new stuff! Got an RK x ring chain, and stock sprockets 16/44 off amazon for about $200.
Now here’s how to install it on the cheap. Don’t have a chain rivet tool? you can use the harbor freight chain breaker ($14), or buy a chain rivet tool from any number of other brands for $100 or more. take your pick. Guess which one I used? I think last time I ended up using a giant C clamp. I prefer the rivet type master links as opposed to the clip on style, just don’t trust those… anyway… on to the next cheap-o loop hole…
Don’t have a moto stand? You can use some sawhorses(look for the quick assemble metal box type at the hardware store. They are metal, $4/pair and made to accept 2x4s) and ratchet straps to hoist it up just enough to remove the rear wheel (If your are changing rear sprocket).

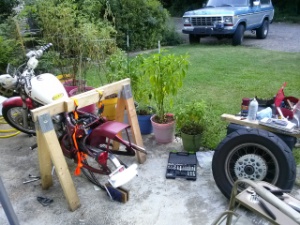
This is the first time I tried this, and it worked well enough, but here are a few pointers:
Either use sawhorses with decently long legs or use a lower point on the bike to hoist it up. Mine were about 3 feet tall and 3.5 feet wide with the ratchet straps wrapped around the top frame rails. My frame VLX rails are exposed because I removed the stock seat. If yours are stock, you’ll need to find another anchor point for each side preferably. Next time I’m going to try attaching to the passenger peg mounts. I barely had enough room to lift the rear up to remove the rear tire, because of the ratchet straps I used and the short sawhorses. Never the less, you only need to lift the rear up enough to remove the rear wheel/axel, so you dont want to hoist it up too far in the air anyway, as it will have a front balance point of the front tire.
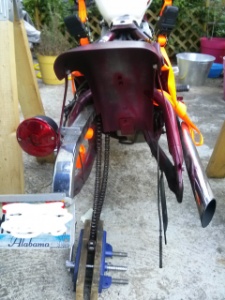
You can maneuver the loose chain off the sprocket and remove the rear wheel first (before breaking the chain). This will give you a little more space to break the chain.
So once the rear tire was removed, Pulled off the old sprocket (You may want to break these sprocket bolts loose while its on the ground). Then replaced with the new one.
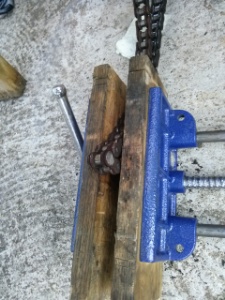
To break the chain, I put it in a vise, to hold it still, and then used a dremel tool cut off wheel to just grind the nub of a pin flat (no bulges on one side so that the pin can be pushed out the other side with the chain break tool). Last time I did this I dremeled through a side plates (a little more work). I suppose if you don’t have a dremel and want to stay ultra cheap, you can hack saw it to death on the side plates.
Removed and replaced the front sprocket (after removing the primary cover). It also helps to shift into gear to remove. Also you should add some locktight to these bolts that hold the front sprocket on.

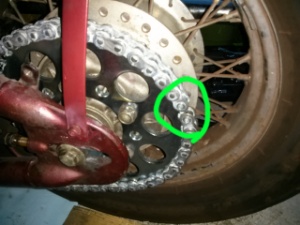
Running the chain: First I put down some boards or something to keep the chain out of the dirt when it hits the ground. The chain will be covered in thick grease that will attract any dirt it touches, so best to try to keep it clean. Also make sure that you have adjusted your rear axel so that there is some slack to install the chain (you’ll adjust this out later). Then put one end of the chain on the top of the rear sprocket (so that end is held by only a few teeth), and run the other end up around the front sprocket and back to the rear (kick it in neutral to roll the chain over the front sprocket). Then put your master link in from the inside of the wheel pointing out. This will give you more space to work with the chain breaker on the outside of the wheel.
Here are a bunch of youtube videos about how to use the harbor freight chain breaker as a rivet tool:
Clean off all the old grease and lube it up and go for a ride, Congratulate yourself on saving some cash from doing this yourself, or just go more bike parts.